ax206-aida64
AX206 3.5-inch LCD Screen
I bought a 3.5” LCD screen from an online store that comes with poor packaging and without any model name or instructions. I spent some days figuring out how to use it, so I wrote this guide for myself and anyone else like me.
Product Model
You could find your model name on your box, the back of the PCB, or the startup image (like me). There are many 3.5” LCD screen variants from different or no-name brands. They look very similar, but their protocols can be different.

Make sure that your model is AX206 3.5” LCD screen, otherwise, this guide can be useless.
Driver
After you connect the screen to your PC via a USB A to C cable, you have to install the driver to let your PC control the screen.
- Download Zadig from the official website, it’s free.
-
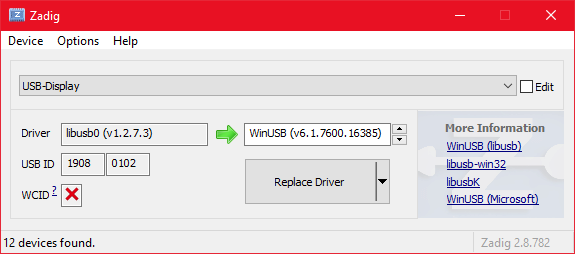
Run it with admin privilege. You should see the GUI like this.
-
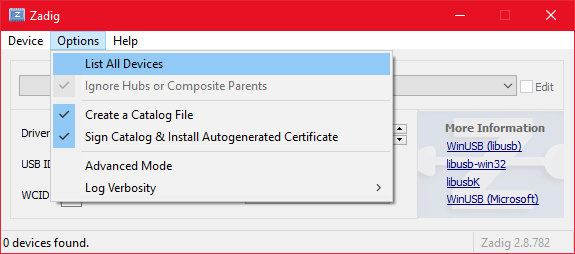
If Zadig can’t recognize your device, click on Options -> List All Devices, then select it manually.
-
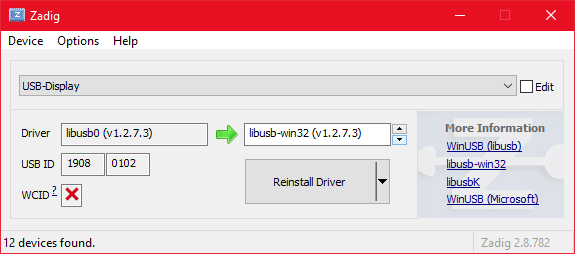
Click on the down arrow to select libusb-win32.
-
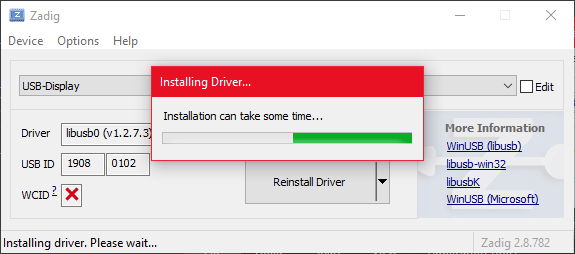
Click on the Install Driver button. I’ve installed it, so it becomes Reinstall Driver.
-
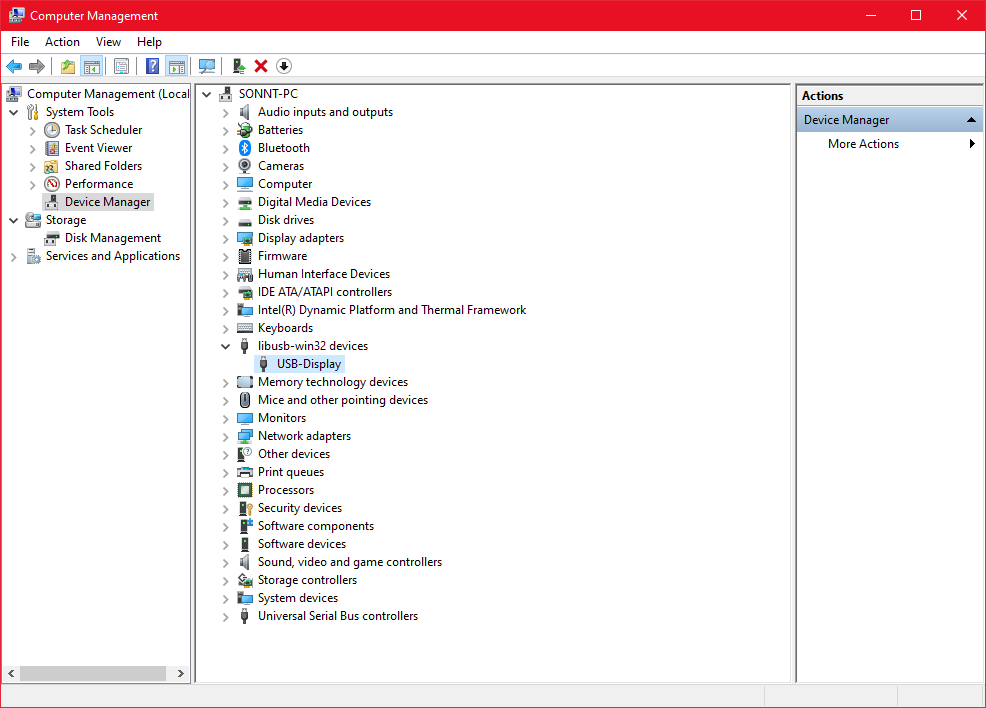
Verify in Device Manager, there should be a USB-Display under libusb-win32 devices.
AIDA64
I’m using AIDA64 Extreme, which is the most popular software for sensor panels. I tried to test with some others, like Turing Smart Screen or an open-source alternative software, but they didn’t work.
- Download AIDA64 from the official website, you may need to buy a key or activate the trial version.
-
Run it with admin privilege. You should see the GUI like this.

-
On the header, click on the gear icon (7th from the left) to open Preferences window.

-
On the navigator, click on LCD. On the main section, select AX206 tab -> Enable AX206 LCD support -> Apply. You may want to rotate or adjust the general settings here.
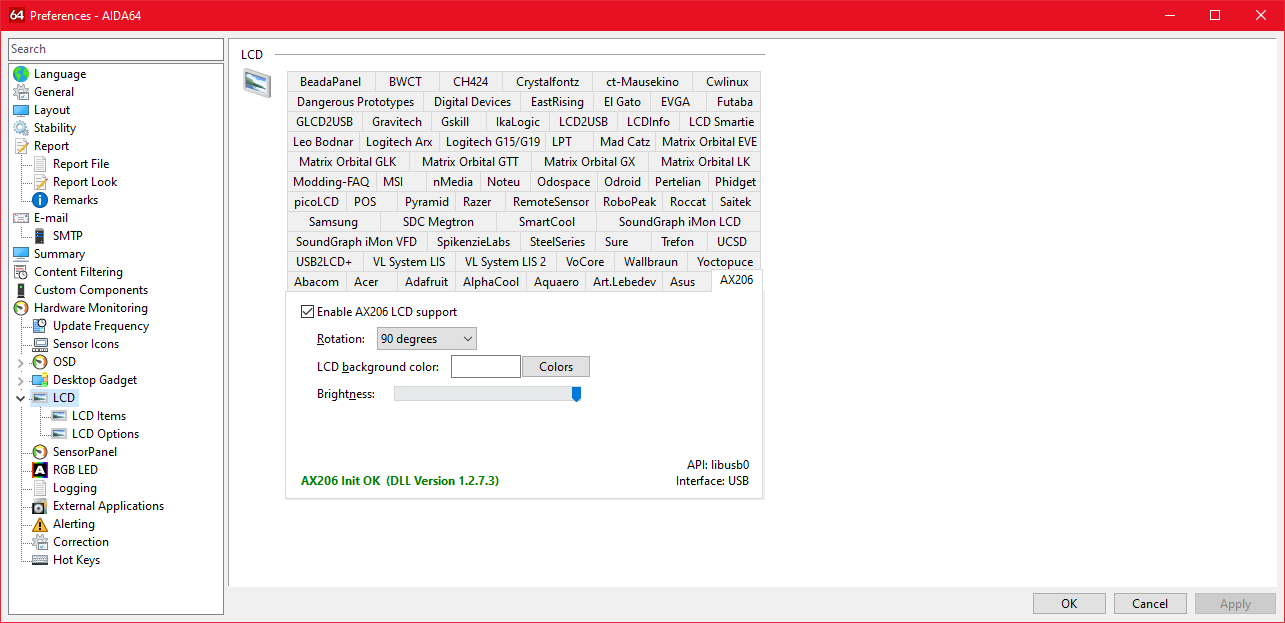
-
On the navigator, click on LCD Items under LCD to customize your screen, or import/export packaged themes.
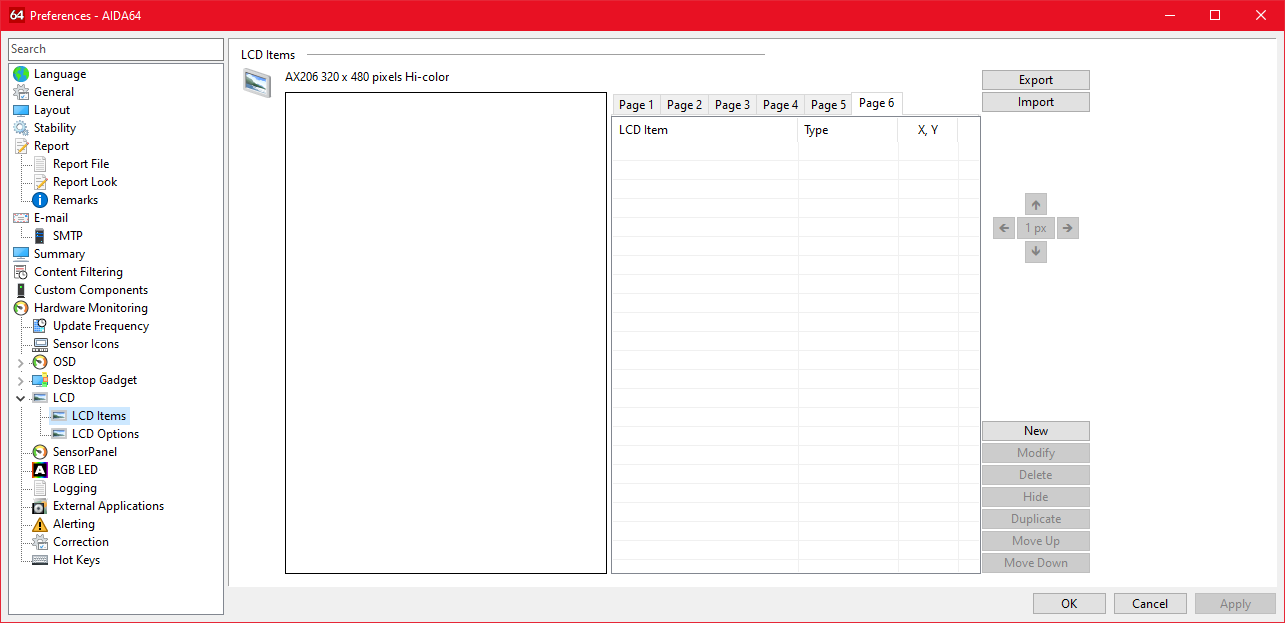
-
You can try to import my sample theme Galaxy-VL for quick start.
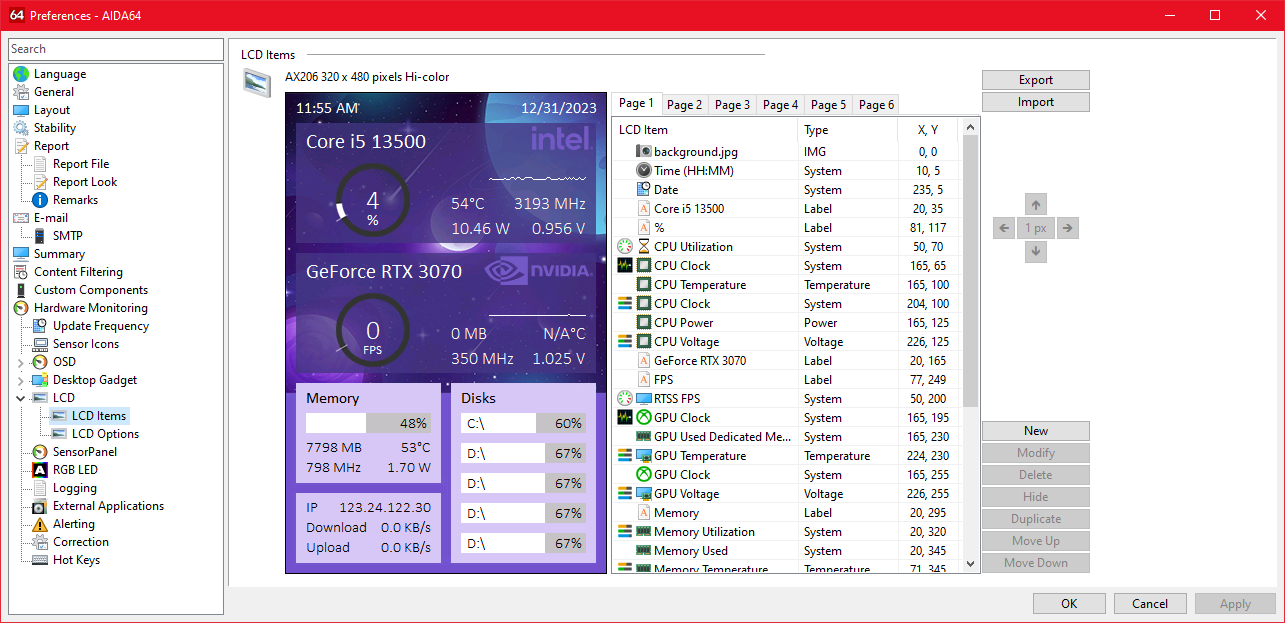
-
In the General settings, these are my recommendations to make AIDA64 work quietly in the background:
- Check Load AIDA64 at Windows startup to let it start automatically.
- Uncheck Display AIDA64 splash screen at startup to skip the banner at startup.
- Check “Close” button minimizes main window to System Tray to keep it running after you close the main windows. Its icon will appear in System Tray instead of Taskbar.
- Select Hide main window (minimize to System Tray) when AIDA64 starts.